QStudio - SQL Notebooks
SQL Notebooks allow developers to write Markdown+SQL and to produce live HTML5 reports.
This page documents specifically how to get started using SQL Notebooks within QStudio. For the complete documentation and tutorials see our specific SQL Notebook Documentation and our SQL Notebook page.
Starting and Stopping
Pulse SQL Notebooks can be started from the Tools Menu or by clicking the Pulse icon on the toolbar:

Once the webserver has been started the icon will turn blue. Right-clicking on the blue icon will stop the server and turn the icon red again.


Getting Started
- Clicking the Pulse Icon will start the server.
- In the
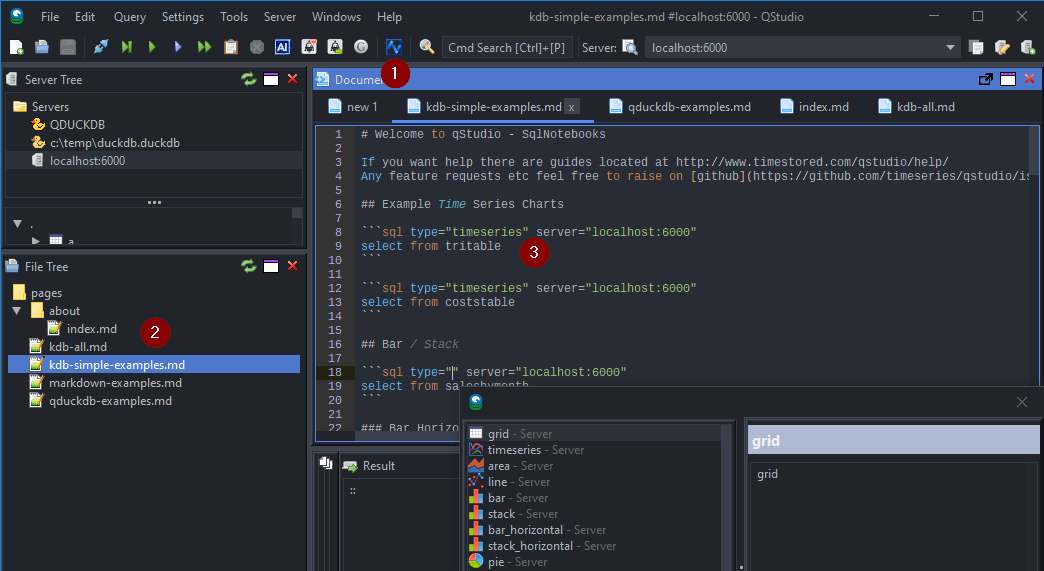
File Treethis will open the sqlnotebook folder located at:C:\Users\{{username}}\qStudio\sqlnotebookby default on windows.Click on one of the .md files to open it. - Inside the .md files is standard markdown plus SQL code blocks that allow rendering charts and tables.

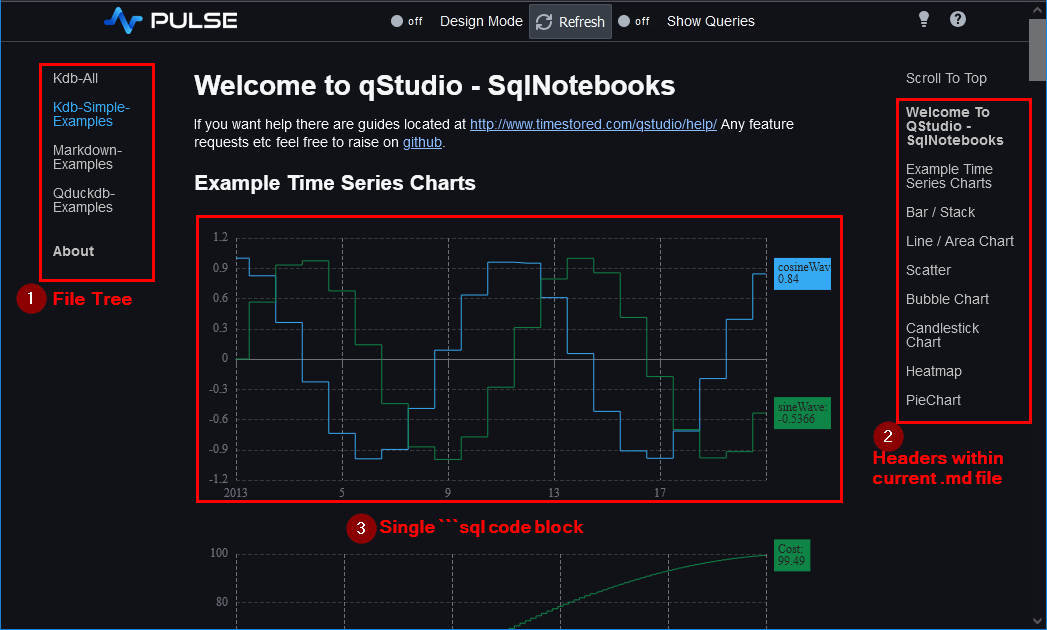
At the same time, a web browser should have opened showing: http://localhost:8088/markdown/ like so. Notice:
- Each .md file in the
File Treeunder thepagesfolder maps to one page on the website. - Each header within the current .md file, becomes an item on the right hand side menu.
- Every
SQL ``` Code Blockrenders as a chart or a table.

Add Chart
To add a chart or table, start an SQL ``` Code Block with three backticks.
Enter the SQL as shown below and end with three backticks. For example:
Chart Options include: grid, timeseries, area, line, bar, stack, bar_horizontal, stack_horizontal, pie, scatter, bubble, candle, depthmap, radar, treemap, heatmap, calendar, boxplot, 3dsurface, 3dbar, sunburst, tree, metrics, sankey
The server should be set to a server name that exists within QStudio. Note, Ctrl + Space can be used to autocomplete the server names like so:

Add Page

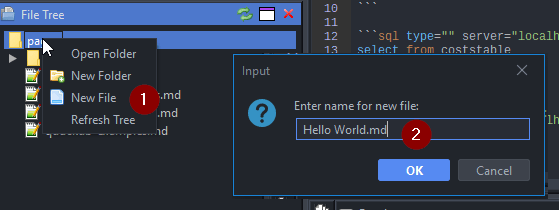
- Right-click on the pages folder and select
New File - Enter a file name that MUST end with .md and press enter.
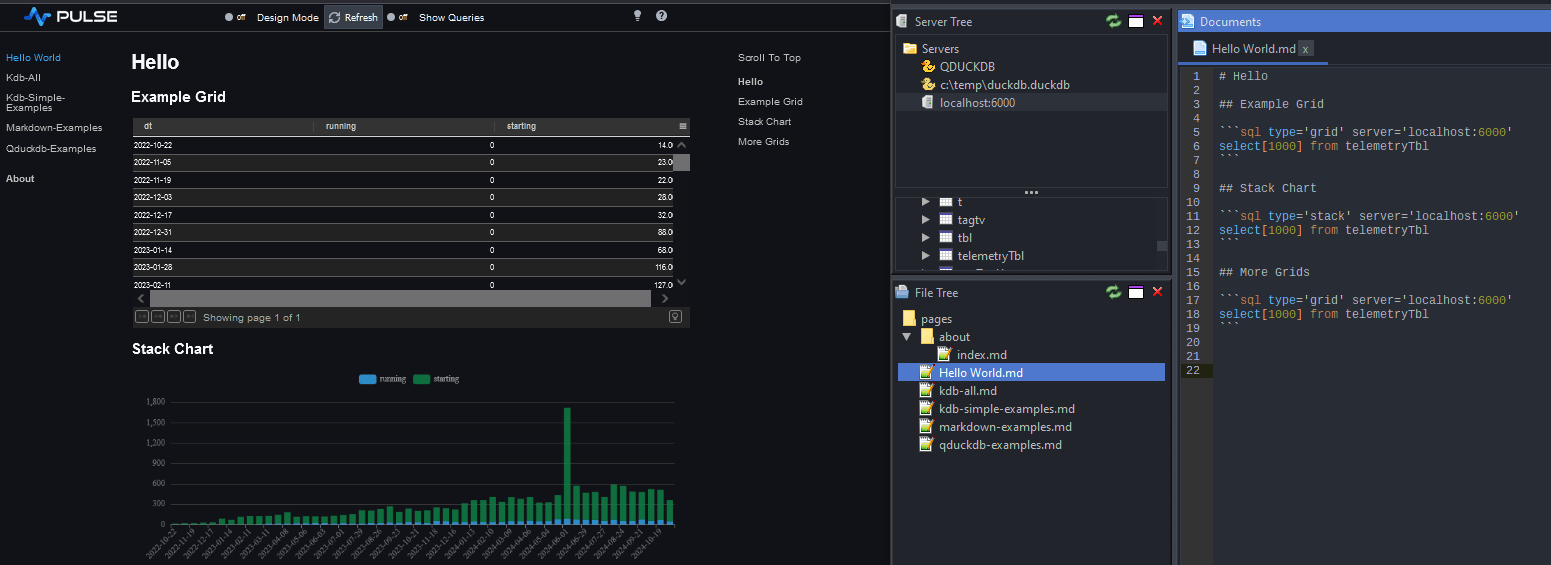
- Left-click on the file tree to open the file and enter some markdown then Press Ctrl + S to save.
- The new page should now be visible on the web version.
