
kdb+ Algo Control
Download Pulse
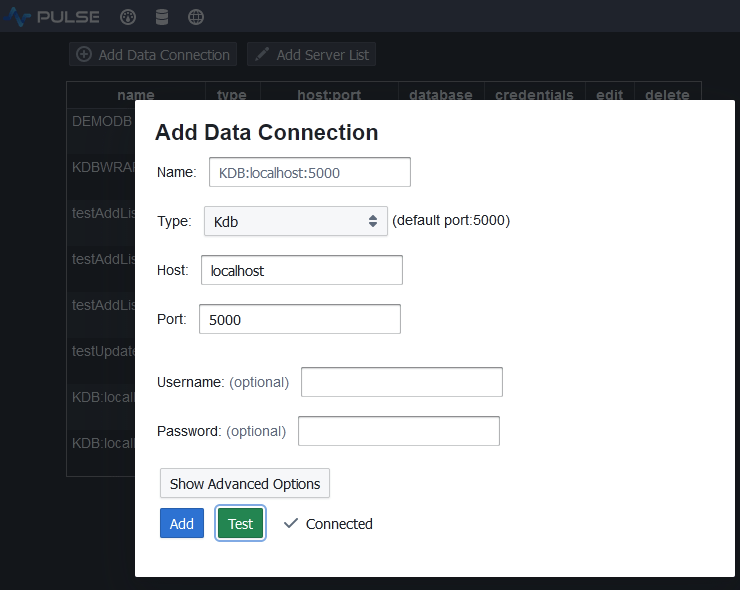
Add kdb+ Server Connection
To add a connection goto Connections->"Add Data Connection" and fill in your details.
You can try clicking test to see if the connection works before adding it.
Populating the Tables
- Go to the SQL Editor
- Make sure your data source is selected
- Enter your SQL query
- Click
Run Allor press ctrl+E
Add and Edit Application
- On the applications listing page, click add

- Click on the newly created application to go into it. Either click on edit or toggle design mode once in the application.

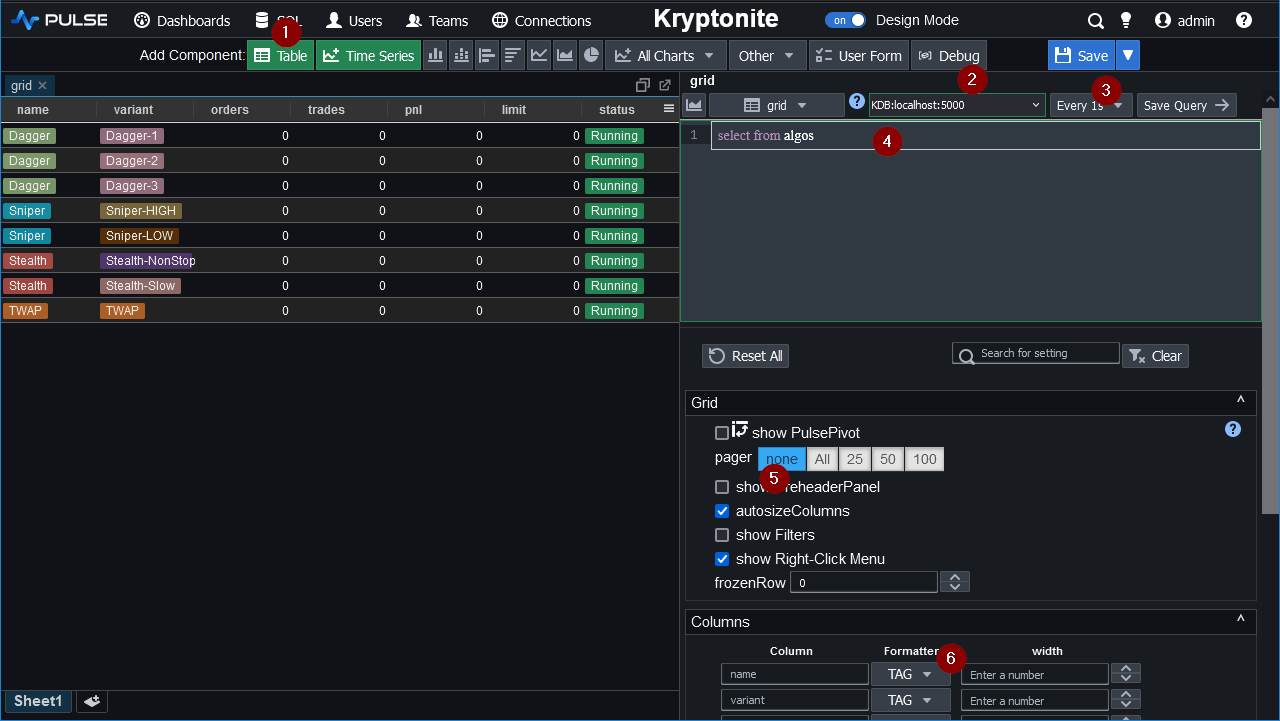
Add Algo Table
- Click
Tableto add that component - Make sure your kdb+ data source is selected
- Select the refresh rate.
Every 1s - Enter your SQL query
select from algosclick save or press ctrl+E - For styling, I have set pager to
none. - and assigned the
TAGformatter to the name and variant columns.
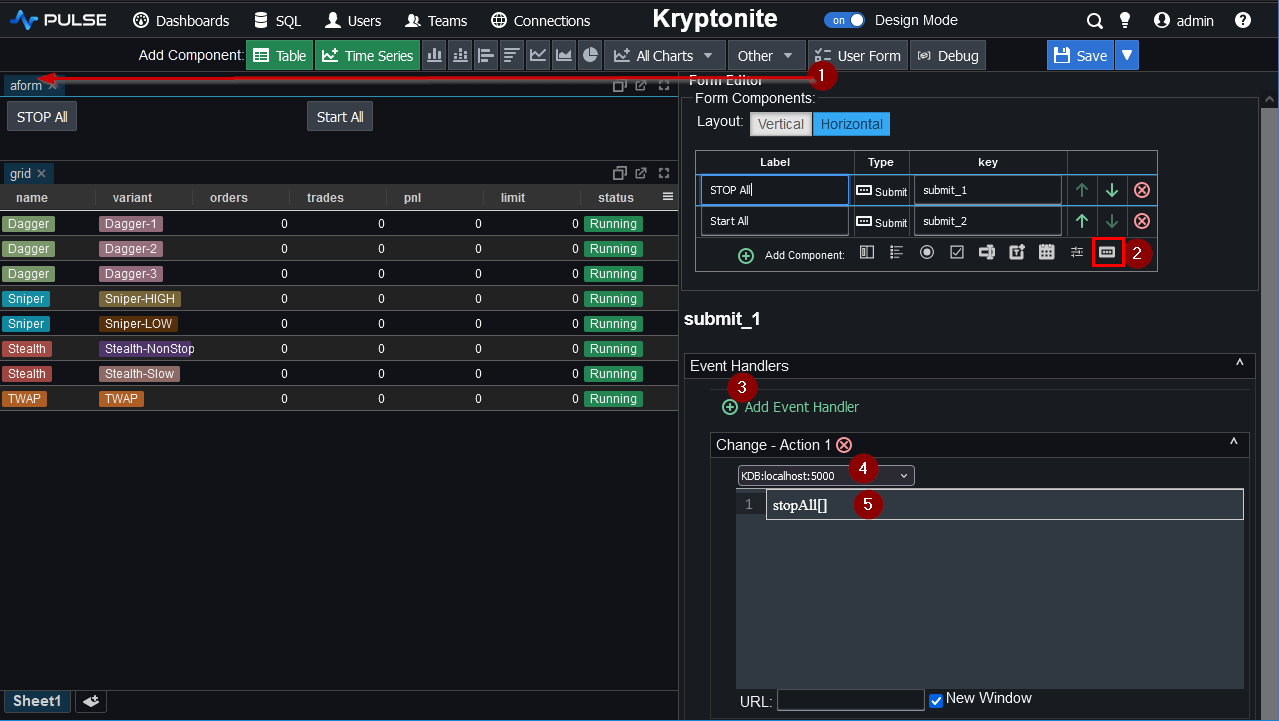
Add Start/Stop Buttons
- Click
User Formto add that component - Click
Add Button Iconto add a button to the form. - Add an
Event Handlerto the button. - Set the kdb+ data source.
- Set the code to:
stopAll[]to call the function. - Perform similar steps again to call
startAll[]with a Start button.
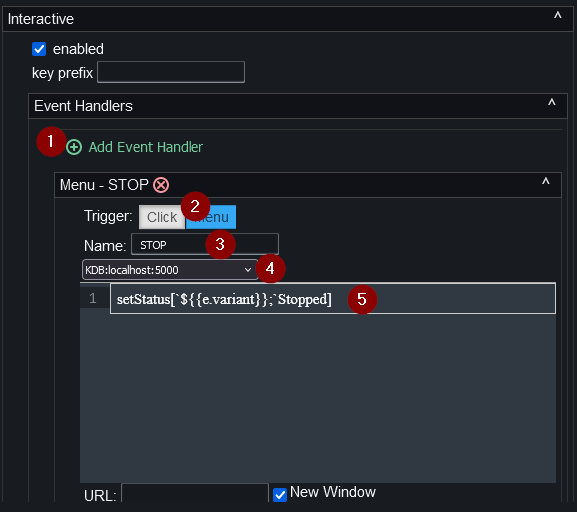
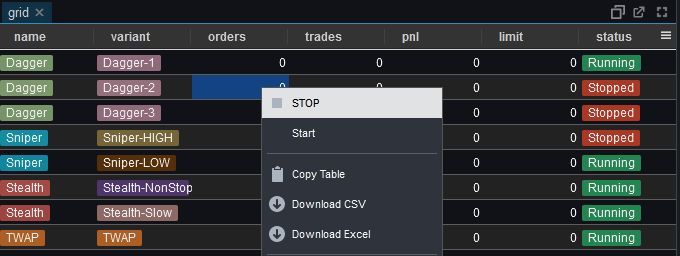
Add Right Click Menu Options
We want to add a right-click menu to the table, that allows starting and stopping individual algos.
To do this, select the grid component and scroll down on the right-hand side editor panel, expand the interactive tab and click Add Event Handler.

- Click
Add Event Handler. - Set the Trigger to
Menu. - Set the Name to
STOP, this controls what the menu option is named. - Set kdb+ as the data source that will recieve the call when an event is triggered.
- Set the code to:
setStatus[`${{e.variant}};`Stopped].
The{{e}}object here is a dictionary that has an entry for every row in the table.
If you wanted you could just send {{e}} and kdb+ would receive a dictionary but we only need the variant column so we will send that casted to symbol. - Perform the steps again, this time calling the menu option Start with code:
setStatus[`${{e.variant}};`Running].
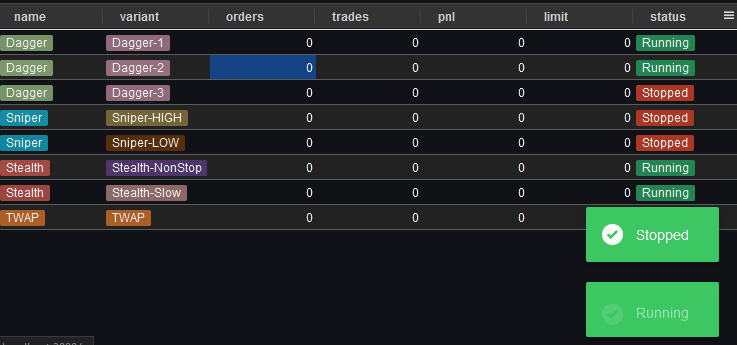
You can now right-click on the table and select Start/Stop for individual Algos.
Notice that the table returned from calling setStatus is dsiplayed as a popup message. When there is one row, it will show the full text, when there are more it may present a summary.
Complete
Congratulations, if you have followed along, you have now created a fully interactive Data App.
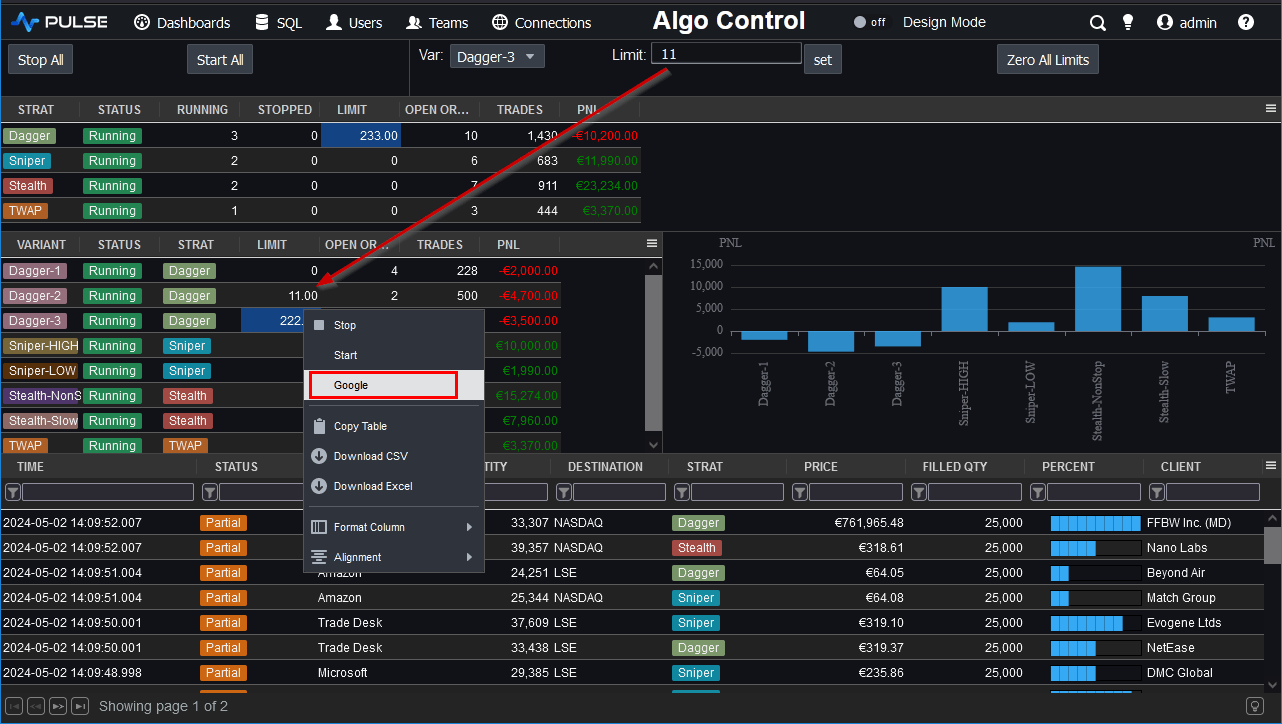
The power of variables allows creating even more advanced interactivity, in the screenshot below you can see
Algo limits being set using a text field and the right click menu has a google entry that opens a new browser window while using
the {{e}} variable to open a specific page relevant to that algo. Something for you to try in future perhaps. Our links below have more information.
Thanks for watching our demo. Please download Pulse to give it a try for yourself.